why hello my creepers :)

Hi everyone! I just wanted to say thanks for checking out my blog! My name is Stacie and have many different hobbies, from arts and crafts to writing. Thank you all for stopping by and if you have any questions or comments just let me know!

-Stacie

So a few things you should know...

I guess I should start with a few pointers for my page. First off, i am very opinionated. So if you get easily offended then you should probably go ahead and close the page. Second off, I have a somewhat sick sense of humor. A lot of people don’t laugh at the same things I laugh at so if you think there is something wrong with me, well your probably right but it has been working for me for the past 24 years so I’m just going to stick with it. Third off, just because I feel a certain way doesn’t mean I expect you to as well. That’s one of the great things about living in America. We are all entitled to feel how we want to and to voice those feelings. If I don’t agree with you on something, that doesn’t mean I am not going to like you, or going to start throwing rocks at you, that just means that your different from me and I can appreciate that.

Thursday, February 23, 2012

Scrapbook Photo Art

My husband and i are looking to buy a home but we know that we have nothing to decorate it when we get it because we have such a small place right now that it would all fill up only one room lol. Soooo i have been trying to make little decor things for the house we buy so we wont have to stress about that later. This is my latest decor for the wall. I used scrapbook paper and designs and just cut out letters and different designs and glued it all together and put it in a picture frame. I was trying to incorporate colors that would go good with the stuff we already have so that wouldn't be an issue. This is a great and fast fix for anyone!

Homemade Laundry Soap Container!


I found a great recipe for making your own laundry detergent online and i thought about making some to see if it would save money. Sure enough it saves a lot and it cleans clothes just as well as the detergent you buy in store. The only problem is that i had nothing to store it in once i made a batch of it. So i found this awesome closeable container from the dollar tree and decided to try to pretty it up some. With some mod podge and some cute print outs this is what i came up with!

Directions:

Find a simple container with a lid from the dollar tree or Walmart, just don't spend a lot. 

Print out a cute design on regular printer paper and cut out strips that will fit around. It doesn't really matter if you over lap them, the seems wont be noticeable after the mod podge is applied.

Using an old small paint brush or sponge apply mod podge to one side of the container and lay the strips on and adjust quickly before the mod podge drys. Continue to do the same to all sides. Its ok if you overlap them. once you have the container covered mod podge on top of all the printer paper.

Allow it to dry overnight, and then enjoy! You could use this for any thing that you can store, it just so happened to be a great laundry container for me!

My first attempt at a felt Rose frame :)


<--- My wonderful picture frame :)


So i saw an awesome picture frame on another blog and i fell in love with it. I was determined to go home and try to make it. I must say that i fell in love with it!! i will definatly be making more in other colors to go around the house and for Christmas gifts! i posted the link that has detailed directions with step by step photos as well. Its a wonderful tutorial!


Thursday, January 5, 2012

Bath Frizzer!!

I saw these neat Bath Frizzers on Martha Stewarts site and i just had to try them, now i love them. I used peppermint for this kind and packaged them for individual treats for my friends, but i also had a jar full of them next to my tub. You can put them in the tub with you or you can put them in the bottom of the shower and inhale the wonderful smell! I listed the recipe below and a picture of one of the frizzers :)
Ice-cube trays serve as molds, giving the fizzies their shape. Using a flexible silicone model lets you slide the cubes out smoothly without breaking them.
Show off the colors of the bath fizzies in glass jars with screw tops, the kind used for storing sugar and flour. Pack each type of fizzy in a separate jar so the scents won't meld. Write the name of the scent on a vellum tag (choose a shade that matches the fizzies), and punch a hole in the top. Thread the tag with ribbon, and tie it around the jar. 
Citric acid, a common food additive, is available at wine-making-supply stores, some spice shops, and online. When citric acid is combined with baking soda and placed in water, a chemical reaction creates bubbles. 
Makes 1 dozen (use 2 per bath)
Tools and Materials
1/2 cup citric acid
1 cup baking soda
3/4 cup cornstarch
1/4 cup organic cane sugar
About 6 drops food coloring
10 to 15 drops essential oil(s)
Special equipment: 2-ounce travel-size spray bottle, plastic pipette, silicone ice-cube tray, storage jars
Directions
1. Stir together citric acid, baking soda, and cornstarch in a glass measuring cup. 
2. Pass mixture through a fine sieve or a flour sifter into a mixing bowl. Stir in sugar. 
3. Fill spray bottle with water, and add food coloring. Spritz mixture lightly (it should become damp but not fizzy) until you can pack mixture with your hands. 
4. Using pipette, add oil, 1 drop at a time, until strength of scent is to your liking. Using a metal spoon or your hands, mix ingredients until color is even throughout (mixture will begin to dry out; when this happens, spritz until packable again). 
5. Spoon into ice-cube tray, pressing firmly. Let dry at room temperature overnight. Pop out of tray gently. Transfer to jars. Link to Martha Stewarts site: http://www.marthastewart.com/271871/bath-fizzies

An easy decorative fun Jar

When my husband and i started dating and we would go to the beach i always was sure to find a few unique (not perfect or normal, but unique) sea shells to bring home. So that way every beach we went to we would have a shell to remember it by. Well those shells added up and i wanted to do something cute with them, and i found some old feathers in the woods to add to them, and this is what i came up with....

My first baby Afghan :)


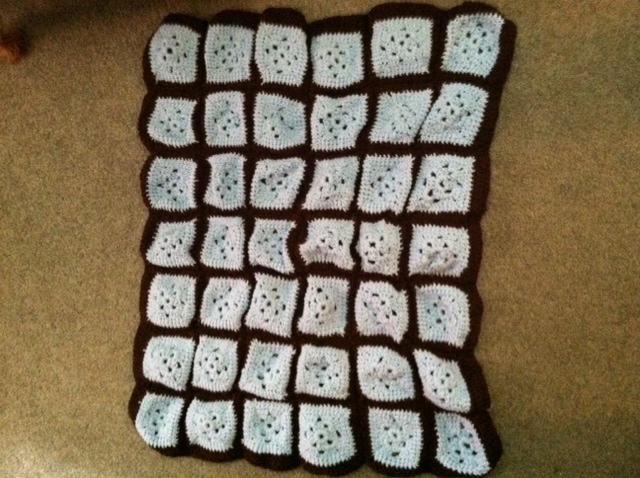
I use to crochet some as a kid with my grandmother but never really got into it until now. This is my first big project and i am super excited about it and how it turned out :) I have attached the crochet pattern that i used for the basic baby square. Happy crocheting everyone!


Materials :

Yarn: You'll need 3 different colors of fingering weight yarn. The sample was made using Baby Blatt / Anny Blatt and Baby Superwash / Bouton D'Or. You can use any similar yarn you like.
Crochet Hook: Size E / 4 - 3.50 mm
For Finishing: Tapestry needle
Finished Size: 8 inches square after blocking
Gauge: 11 sts and 11 rows = 2 inches when working in rows of single crochet stitch (measured prior to blocking.)

Crochet Instructions:

Work in the front loops of the single crochet stitches unless directed otherwise. Begin using color A (the main color - baby blue in my sample.)
Ch 31.
Sc in second chain from hook.
Row 1: Work 30 sc.
Row 2: Ch 1, turn. Work 30 sc.
Rows 3 - 30: Repeat row 2.
At this point, your piece should measure approximately 5 1/2 inches square, or close to it.
Finish off. Weave in ends.

Edging Instructions:

Begin working in rounds.
Round 1: Attach color B in upper left corner by drawing a loop through. Leave a tail of yarn at least 6 inches long, which will be woven in at the end. In my sample, color b is the lavender color.
Ch 1 (counts as first sc st.) Work 29 more evenly spaced sc sts, one stitch per row, for a total of 30 sts.
Ch 2 to form the corner.
Working into your starting chain, sc 30 evenly spaced sts across.
Ch 2 to form the corner.
Work 30 sc, spacing them evenly across with one sc per row.
Ch 2 to form the corner.
Work 30 sc across the upper edge of the square.
Ch 2 to form the corner. Join with a sl st to the first ch worked in the round.
Round 2: Continue working in color B. Ch 1. Work another round of single crochet. In the corners: Work 1 sc into the ch-2 sp, ch 2, work 1 sc into the ch-2 sp. This will give you 32 sc sts on each side for a total of 128 sc all the way around. Join with a sl st to beginning of round. Finish off, leaving a long tail of yarn.
Round 3: Join color C by drawing up a loop, leaving a tail of yarn longer than 6 inches. In my sample, color C is the light gray color.
Ch 1. Work another round of single crochet. In the corners: Work 1 sc into the ch-2 sp, ch 2, work 1 sc into the ch-2 sp. This will give you 34 sc sts on each side for a total of 136 sc all the way around. Join with a sl st to beginning of round.
Round 4: Continue working in color C. Ch 1. Work another round of single crochet. In the corners: Work 1 sc into the ch-2 sp, ch 2, work 1 sc into the ch-2 sp. This will give you 36 sc sts on each side for a total of 144 sc all the way around. Join with a sl st to beginning of round.
Round 5: Continue working in color C. Ch 1. Work another round of single crochet. In the corners: Work 1 sc into the ch-2 sp, ch 2, work 1 sc into the ch-2 sp. This will give you 38 sc sts on each side for a total of 152 sc all the way around. Join with a sl st to beginning of round.
Round 6: Continue working in color C. Ch 1. Work another round of single crochet. In the corners: Work 1 sc into the ch-2 sp, ch 2, work 1 sc into the ch-2 sp. This will give you 40 sc sts on each side for a total of 160 sc all the way around. Join with a sl st to beginning of round.
Finish off, leaving a long tail of yarn. Weave in the ends securely using a tapestry needle.
Work a row of slip stitches on the surface of the afghan square, between colors A and B.
To do this, insert your crochet hook into one of the corners, in the area where color B touches color A. Draw up a loop. Insert your hook again in the next stitch, and pull another loop through to form a slip stitch. Continue working in this way, all the way around.
End off, pulling the yarn through to the reverse side. Leave a long tail of yarn and weave the end in securely.